


How To Back Up Your Old Android Text Messages

Contents
Our smartphones hold countless conversations and memories. Unfortunate circumstances, such as a lost, stolen, or malfunctioning phone can cause us to lose them all within seconds. It’s also highly recommended to wipe the phone’s data off before selling it.
That’s where backups become helpful. Whether you own the latest Android 15-supported smartphone or an affordable Android phone, backing up your Android text messages remains the same. Our guide teaches you how to create new backups while automating SMS backups to protect your data from future mishaps.

Related
How to use Android’s built-in SMS Backup
Many phones (including Pixel phones) have a built-in automatic SMS backup, courtesy of Google, in the messaging app.
You can restore backed-up data (including SMS messages) after the initial setup of a new phone. The simplest way to do so is to look for the “Finish setting up” notification at the top of the settings panel. When you tap the Finish Setup button, it performs the same restoration maneuver it would on the initial setup. This can include restoring previously backed-up SMS messages from your devices.
The data is stored in Google Drive as a part of Android’s automatic backups. You can view the backups via the Android app, but not the contents. To start the backup process, go into your phone settings. Tap Settings > System > Backup. You can also use the search function in Settings to find Backup.
SMS backups created this way can’t be easily copied or moved and don’t include MMS media.
The built-in system is useful and automatic. Still, there isn’t a way to start the restoration process manually or view the backed-up contents. For instance, you can’t read those messages off-device, and you can’t save them long-term. The backups expire, and you can’t set them aside permanently. This automatic system might not fit your needs.
Related
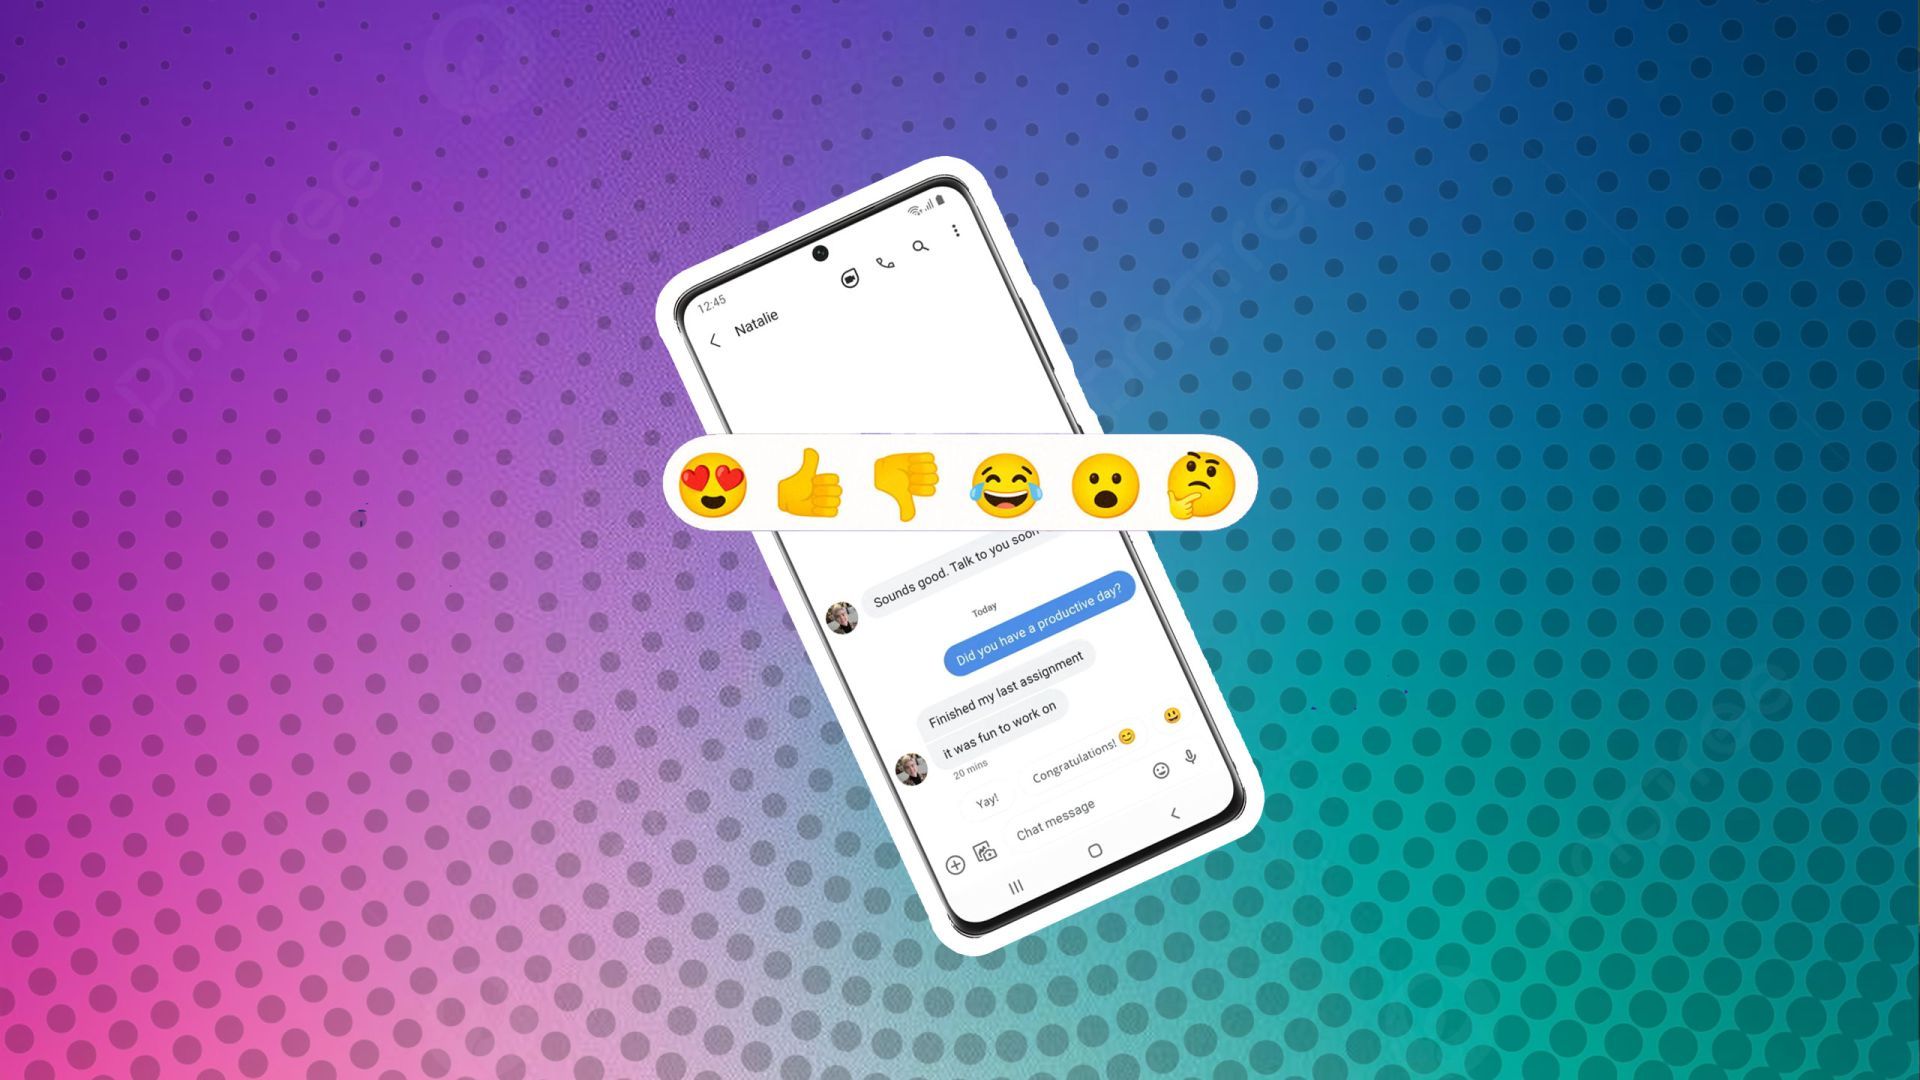
How to like a text message on your Android phone
Like a text message on Android and send message reactions!
Several apps can back up and restore your SMS messages with better utility. Two of the best free backup options in this category are SMS Backup+ and SMS Backup & Restore. Both let you view your messages and back up with more control than the default system.
How to use the SMS Backup+ app
If you want to move your messages (without having local access to them), SMS Backup+ is your best choice. This open-source app allows you to automatically back up your SMS, MMS, and call history to your Gmail account inside the “SMS” label.
SMS Backup+ is no longer available on the Play Store for Android devices with the latest operating systems. New users can download it via GitHub or APK Mirror.

Google changed how SMS Backup+ signs in and integrates with Gmail by default as a result of changes to the API settings. You can still use the app, but it requires a different setup process than before.
SMS Backup+ relies on Google’s App Passwords, which requires two-factor authentication. Activate 2FA before you proceed with the steps below.
How to set up the SMS Backup+ app
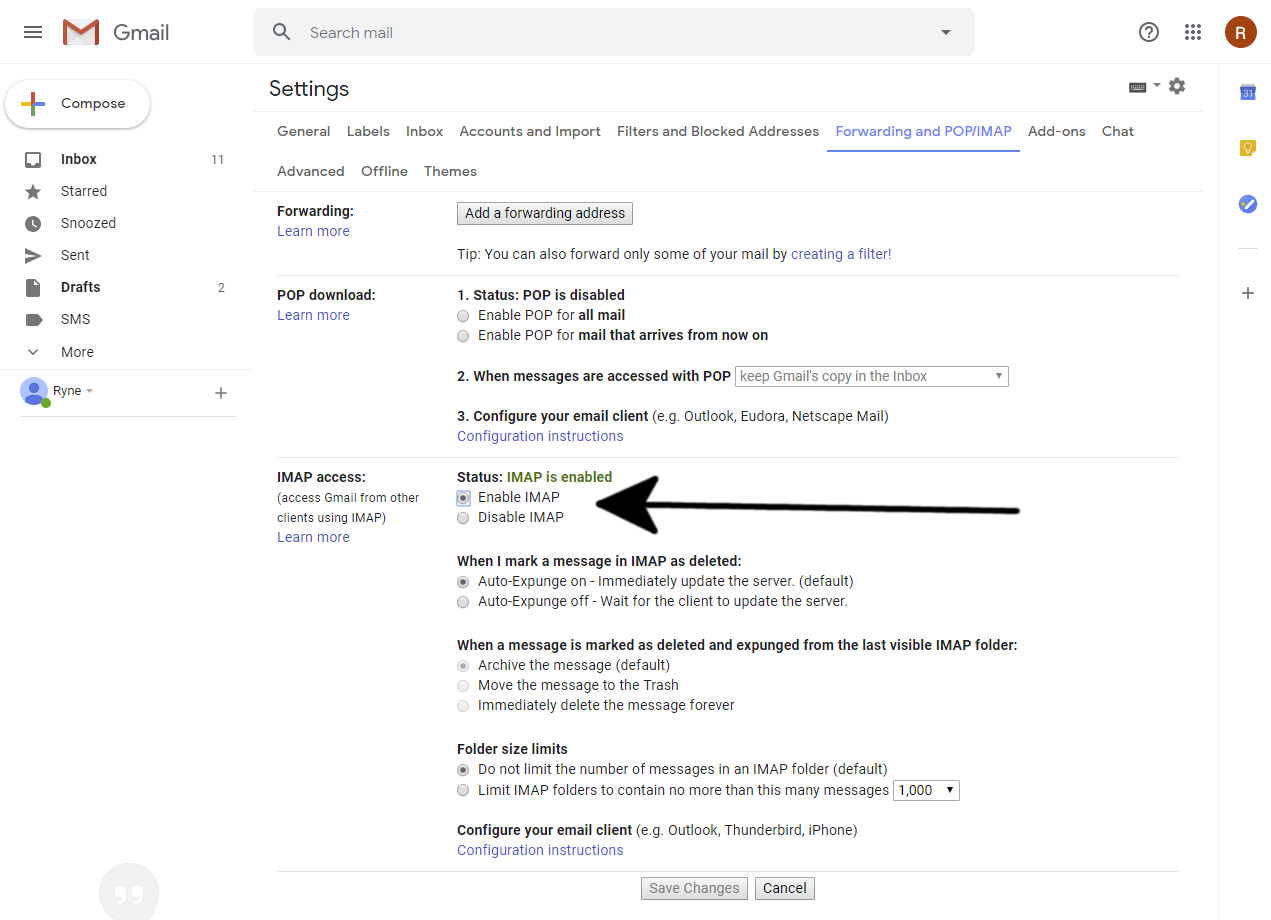
- Allow IMAP access in Gmail settings. Select the Settings icon on the Gmail website. Then, go to See all settings > Forwarding and POP/IMAP. Select Enable IMAP and click Save Changes at the bottom of the screen.

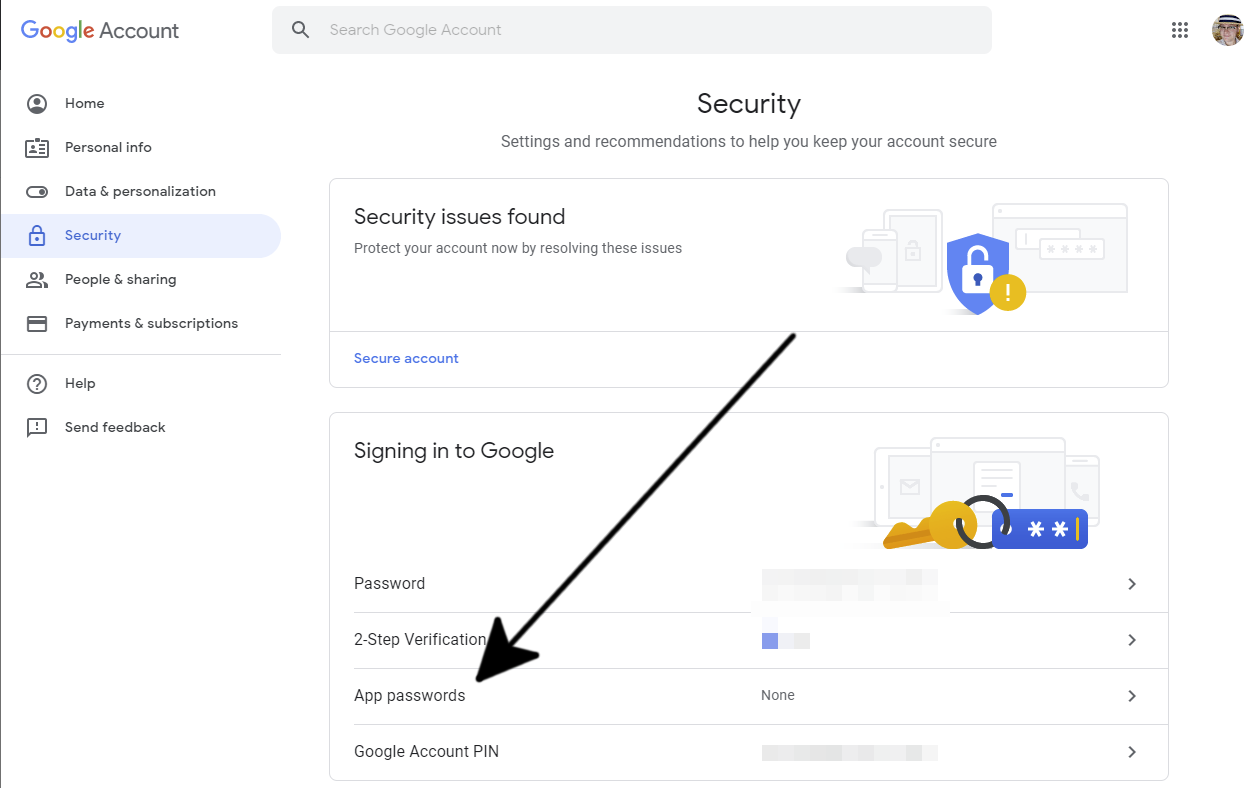
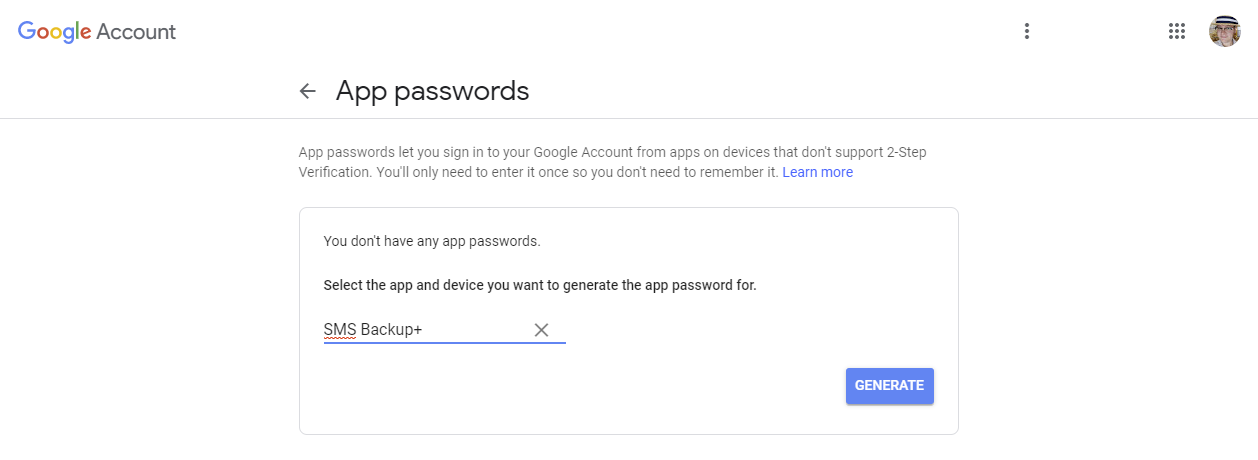
- Make an app password for SMS Backup+. Go to security.google.com and select App passwords. You’re prompted to sign in again.
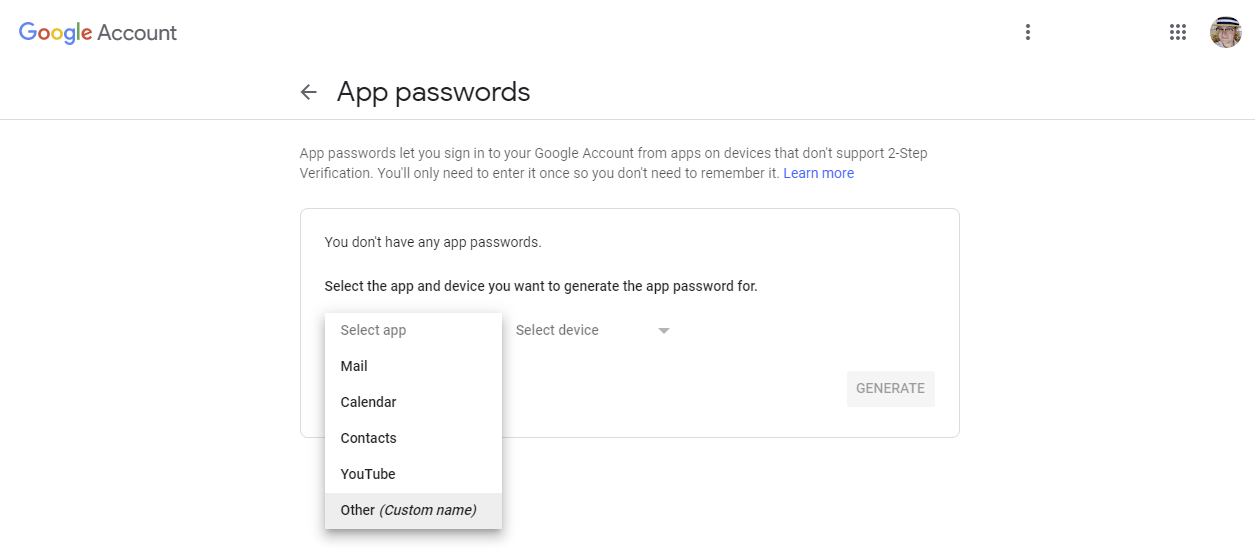
- The next screen shows a pair of drop-down lists for categorizing the app password you’re about to make. Select Other from the drop-down list.
- Give the password a descriptive name like “SMS Backup+” so that you know what it’s for when you see it later.
- Click Generate.
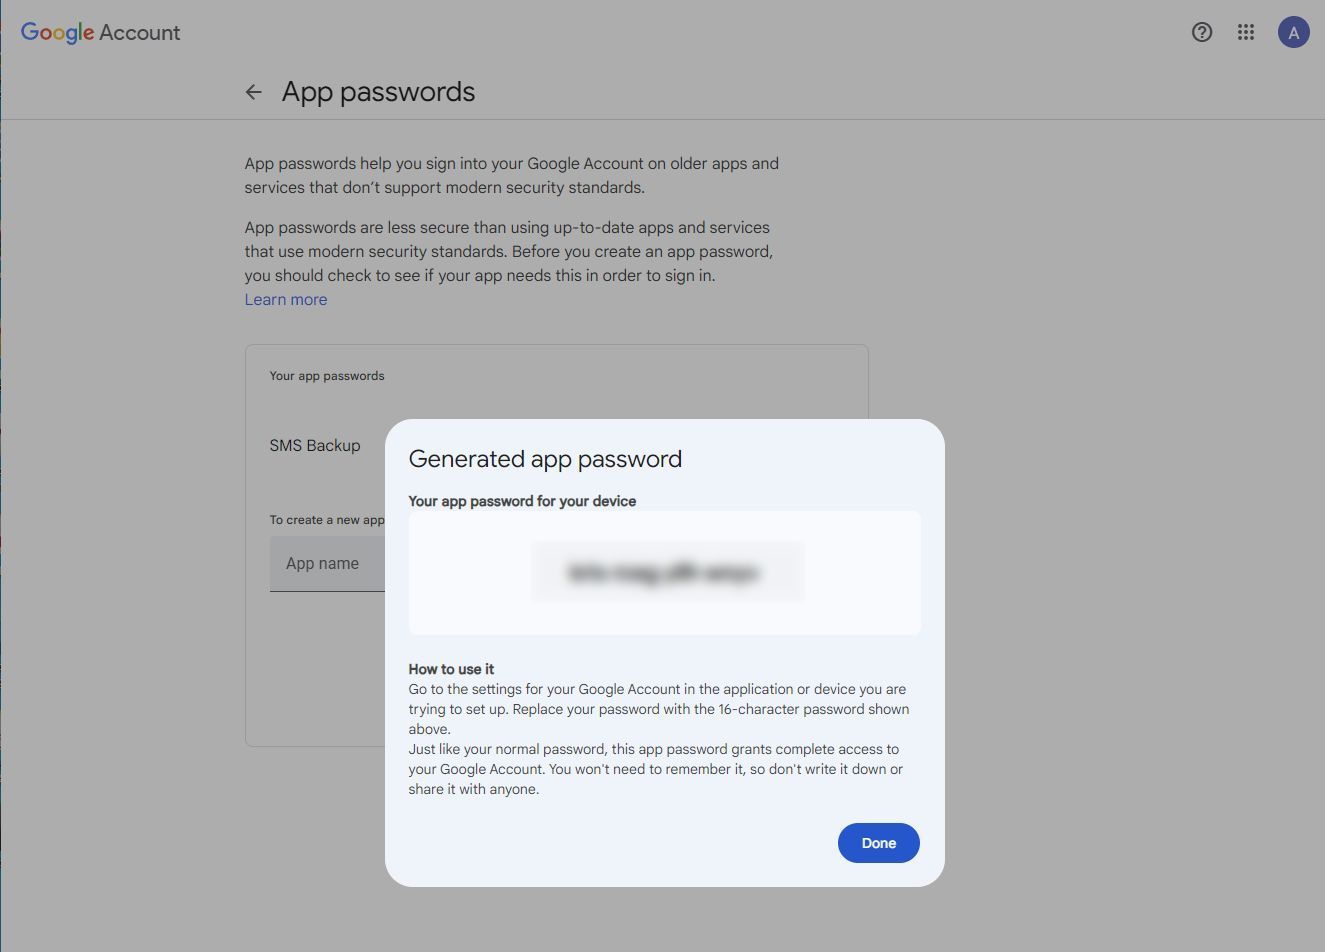
Google gives you a randomly generated 16-character password. Handle it as carefully as your regular password. Don’t write it on a note and stick it on your monitor. Don’t copy it to Google Drive or Keep. This password grants access to your Google account without the security of two-factor authentication. Treat it like something that would ruin your life if it fell into the wrong hands.
You’re ready to set up the SMS Backup+ app. Follow these steps to get it done:
- Open SMS Backup+ on your phone.
- Tap Advanced settings.
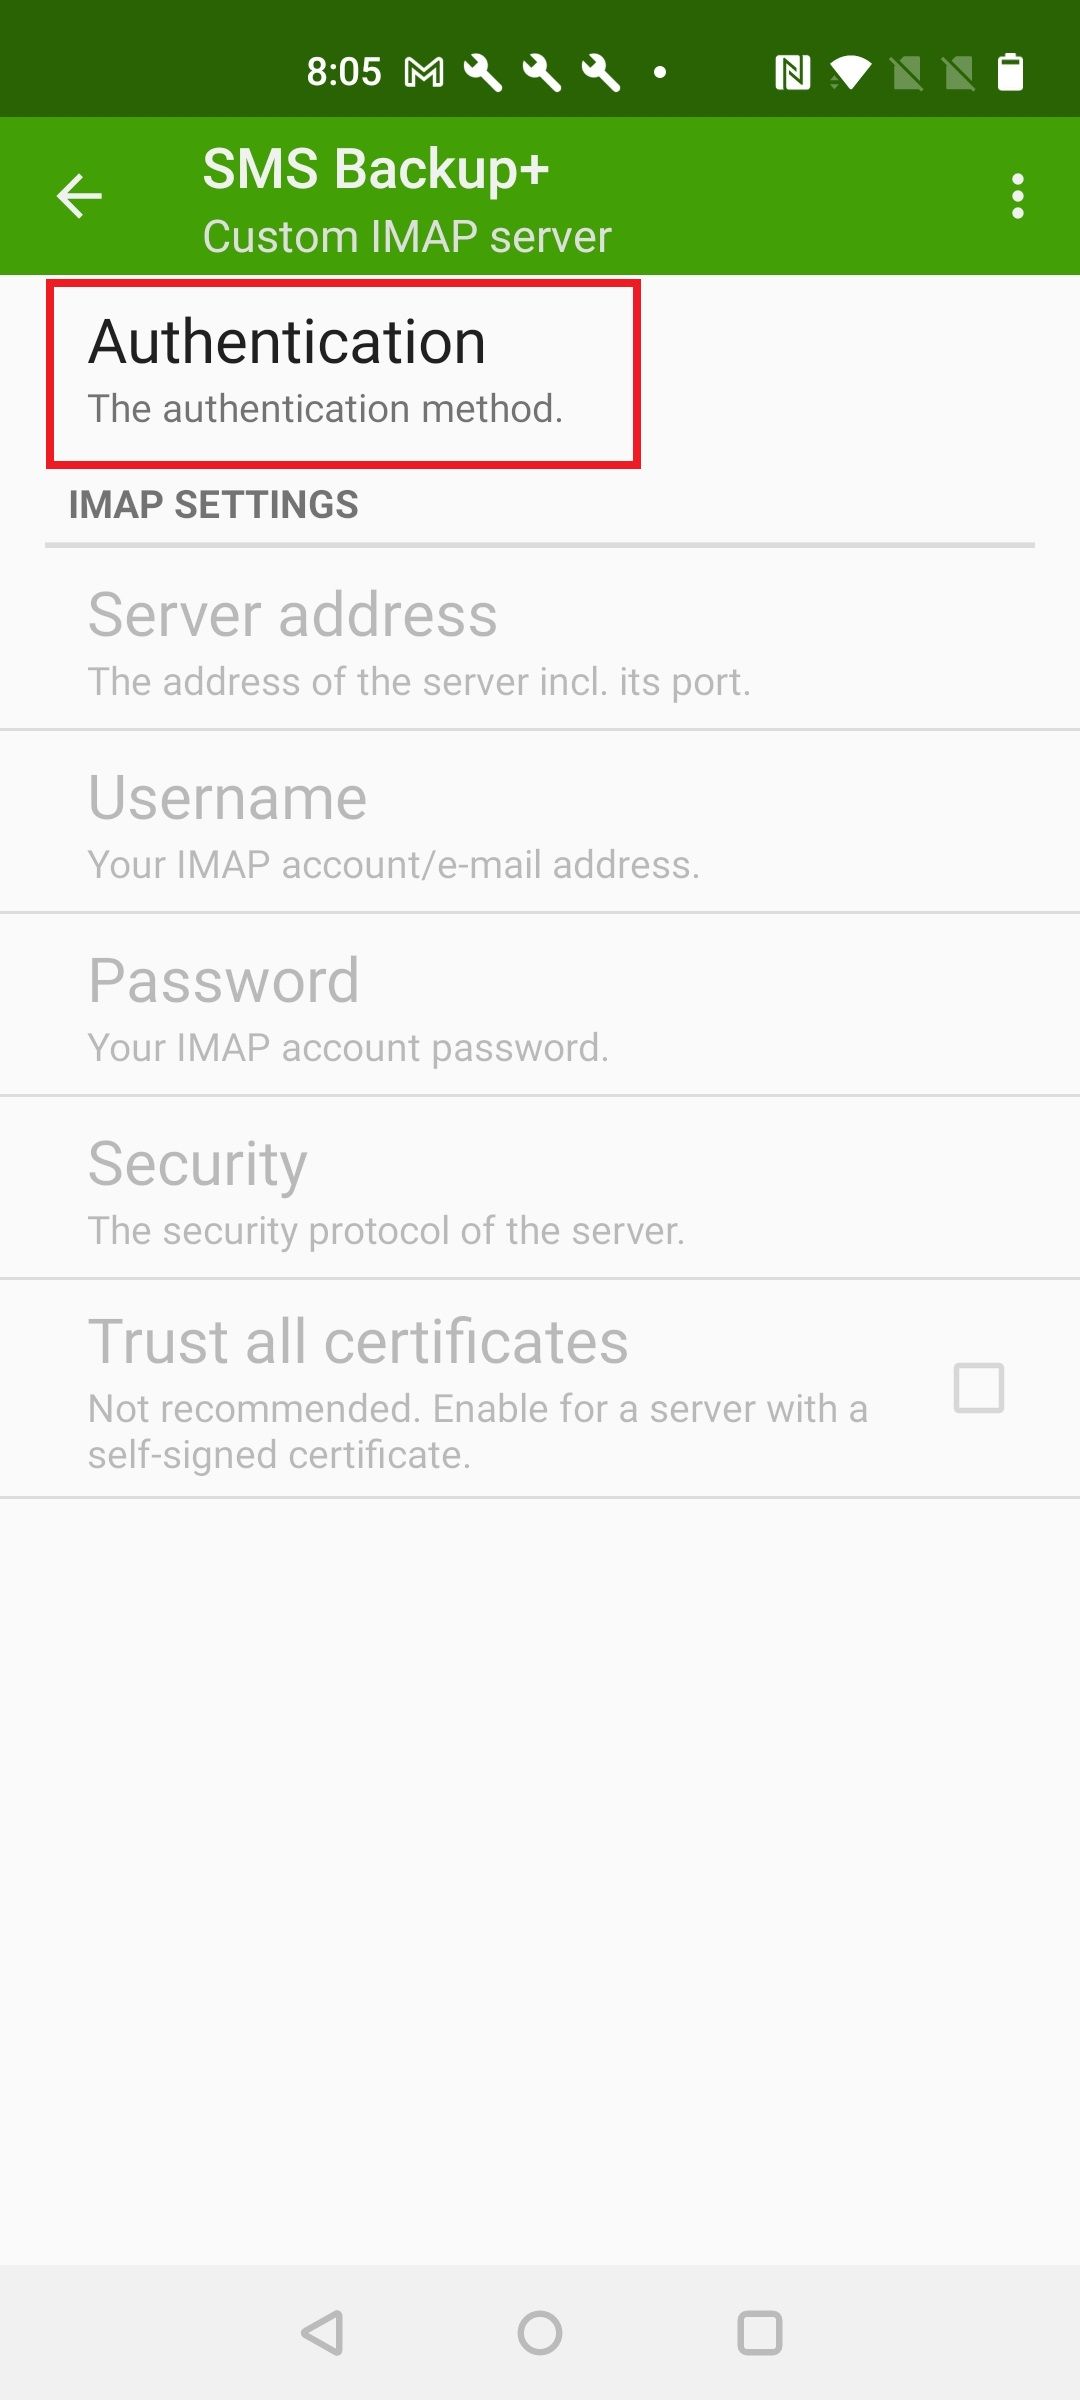
- Tap Custom IMAP server.
- Select Authentication.
- Select Plain text.
- Tap Username and enter your Gmail address.
- Tap Password and enter the app password generated in Gmail settings.
- Verify that the setting in Security is set to TLS.
- Go to the app’s main screen. You can now take SMS backups. The Connect section for linking to a Gmail account is grayed out.
You can configure other backup settings, such as SMS/MMS backup settings, call log backup settings, per-contact backups, and other details.
The backup process for SMS Backup+ is slow, especially when creating a new backup. However, if you are using the system for a one-time migration between devices, the next app might better suit your needs.
How to use the SMS Backup & Restore app
SMS Backup & Restore changed hands a few times in recent history. Carbonite bought it and later sold it to SyncTech. It’s a free app for exporting SMS and MMS messages to a single file.
On the first launch, SMS Backup & Restore displays a walk-through explaining the permissions it needs to request and why. It asks for these permissions before showing the home screen.
The manual backup process is simple. Follow these steps to get it done:
- Tap Set Up a Backup and follow the instructions. Go to the advanced menu and select individual conversations if you don’t want to save everything.
- When asked where to store the backup, select one of the following: Google Drive, Dropbox, OneDrive, or local storage. Google Drive is handy if you maintain the backup as a static archive. Local storage is useful when flashing a new ROM.
- You can set up scheduled backups and automatically remove old files. Select the option that works for you, depending on your storage size and data plan.
- When you’ve set it the way you want, tap Back Up Now.
One advantage when compared to SMS Backup+ is that this app is faster.
To restore backups on another device, swipe from the left edge to pull up the navigation menu and select Restore. You can also use the Transfer option, which sends files from app to app over Wi-Fi. If you perform a restore with a local file, make sure it was copied to the device.
Whichever method you choose, pulling messages back down is easy, and the app walks you through locating the correct backup on internal or cloud storage.
SMS Backup & Restore has other features for performing and maintaining scheduled backups. The advantages of Gmail storage, conversation view, and one-at-a-time backups in SMS Backup+ may be more useful for those seeking a versatile tool. With larger backup sizes and no easy way to view them online, SMS Backup & Restore is more suited to one-time backups or migrations.
WhatsApp can do it all on Android
If your carrier allows it, enabling RCS chat has improved texting on Android. Otherwise, WhatsApp is a great alternative to Google Messages. It’s a reliable, free texting app that lets you make free voice and video calls, send large documents, and use it on a desktop.
